
ねえねえ、チーズくん。アマゾンのAlexaって便利だよね。
もっと自分好みにカスタマイズできたらもっと楽しいと思わない?

確かに!自分でAlexaスキルを作れたら面白いだろうね。
でもそんなことできるの?
Alexa Developer Consoleから自分のAlexaスキルを作成することができるんだ。今回は、実際にAWS Lambdaというサービスを使ってスキルを作成してみるよ。
おお!一体どんなスキルを作成するの?(ワクワク)

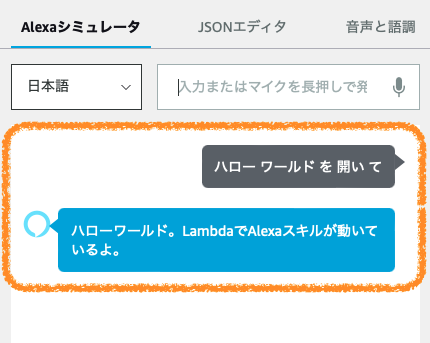
アレクサ、ハローワールドを開いて

ハローワールド。LambdaでAlexaスキルが動いているよ。
こんなやりとりができるスキルだよ。

え、それだけ?しょぼくない?
今回は一旦、AlexaスキルをLambdaでカスタマイズできることの確認がしたいだけだから、シンプルな実装で良いんだよ。
これを応用できるようになれば、もっと実用的なものも作れるからね!

何事も基礎は大事だってことだね。
日進月歩てやつか〜
本記事は詳細な内容を解説するというよりは、とりあえず動くものを作ってみるということに重点を置いています。
作成するスキル自体は実用性のないものですが、ひとまずAlexaスキルを自身で作成して動かしてみたいという方にとって本記事の内容が参考になれば幸いです。
それではどうぞ。
Contents
Alexa Developer Consoleの設定

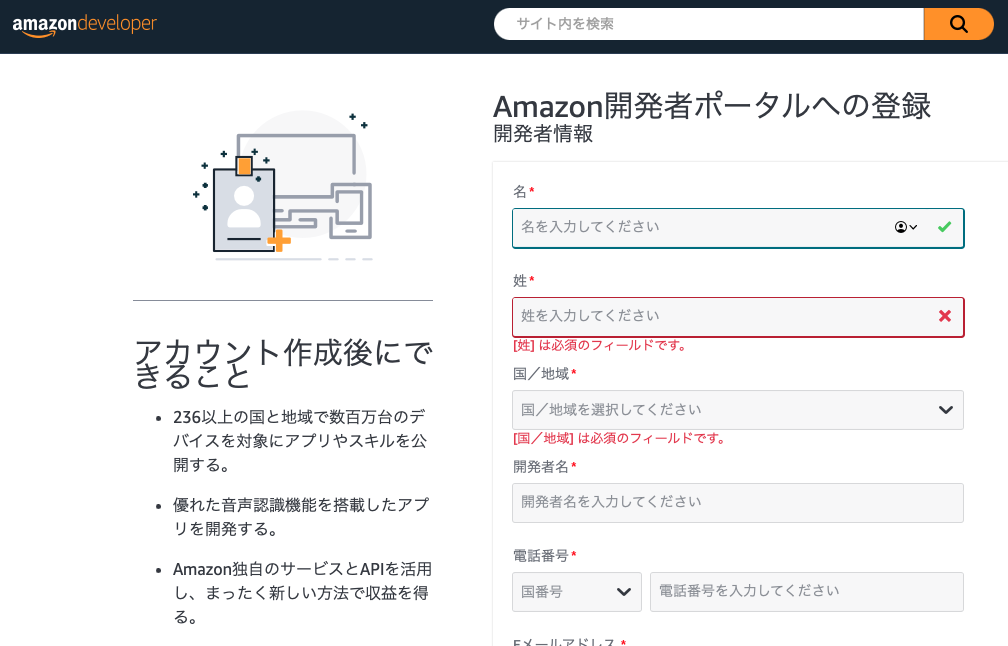
まず初めにAlexa Developer Consoleにアクセスします。
(Alexa Developer Consoleのアカウントがない場合は、最初に登録する必要があります。)
↓↓
カスタムスキルの作成
以下の手順でカスタムスキルの作成を行います。
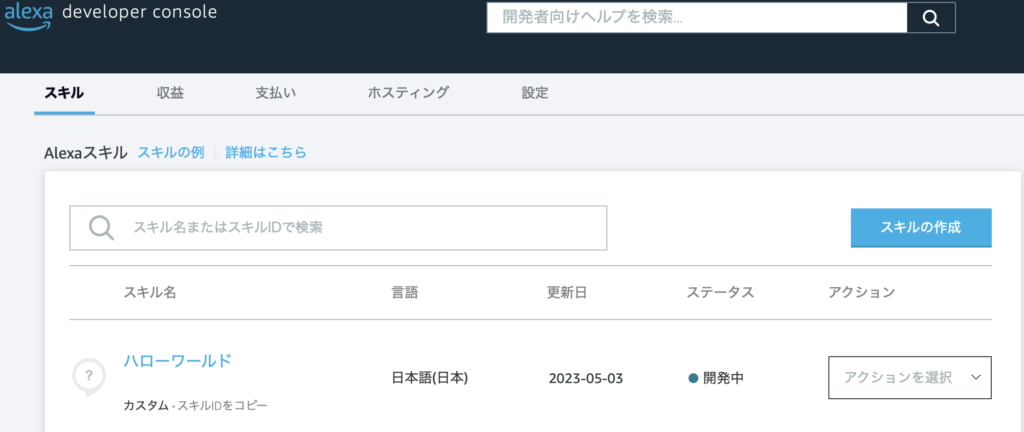
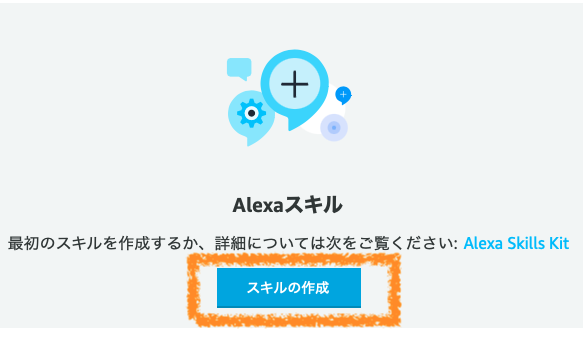
Alexa Developer Consoleのトップページから、「スキルの作成」を押下します。
スキル名、言語を選択します。
(スキル名は任意で大丈夫です。)

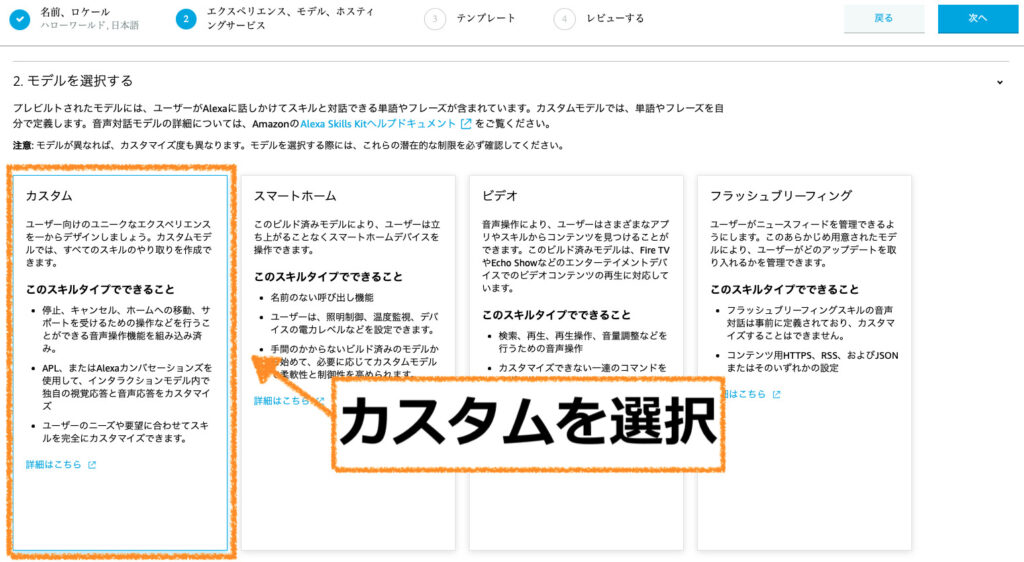
「1.エクスペリエンスタイプ」で「その他」を選択します。

「2.モデルを選択する」で「カスタム」を選択します。
「3.ホスティングサービス」で「Alexa hosted(Python)」を選択します。
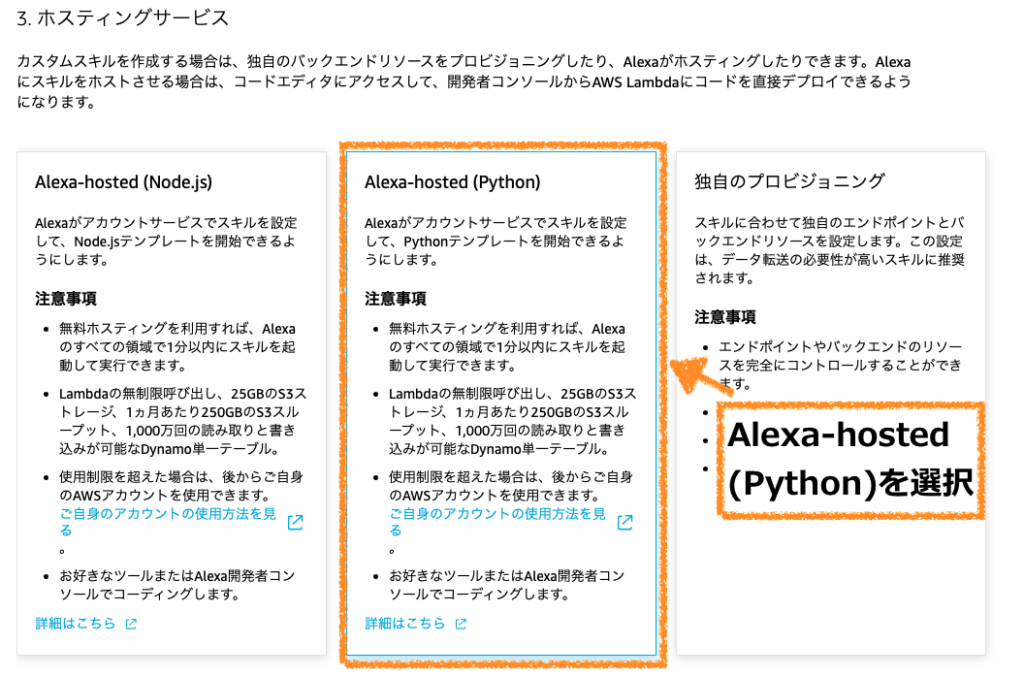
「ホスト地域」で「米国東部(バージニア北部)」を選択します。

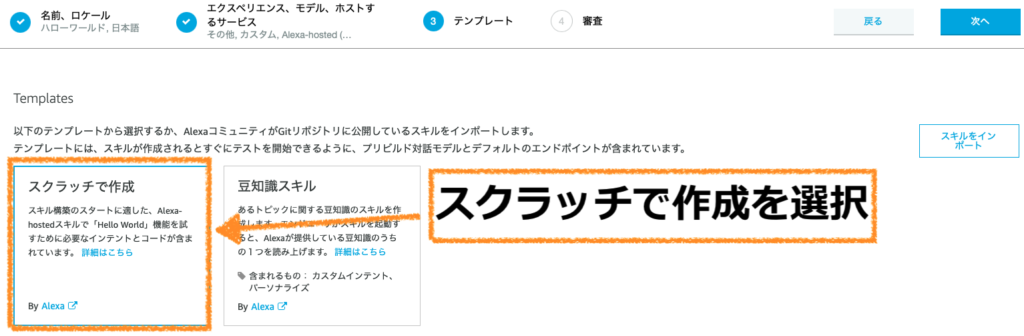
「Templates」で「スクラッチで作成」を選択します。
(テンプレートを使用せず、カスタムスキルを作成するため)
内容に問題がないことを確認したら、「Create Skill」を押下します。
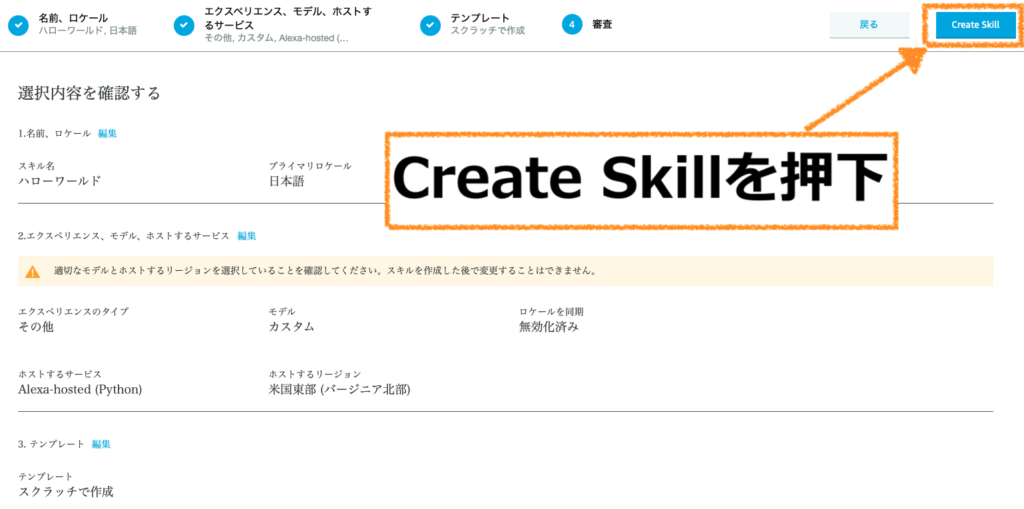
約1分ほどでスキル作成が完了します。
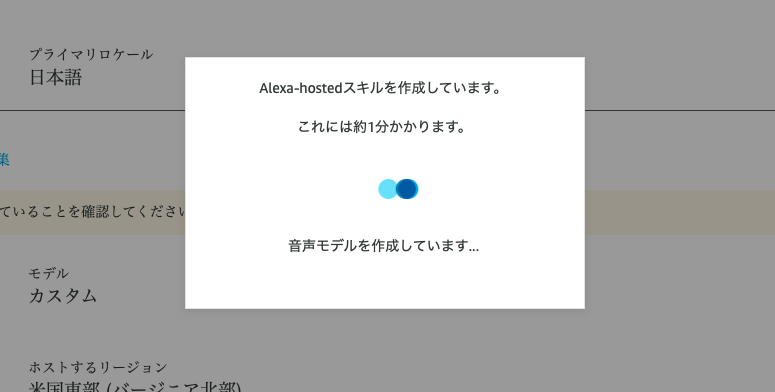
スキルのトップ画面はこんな感じです。
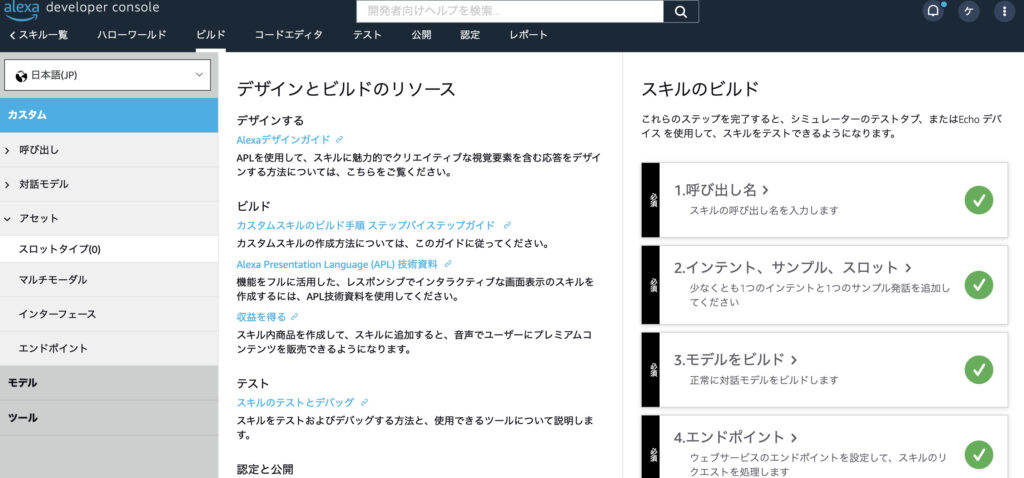
作成したカスタムスキルの設定
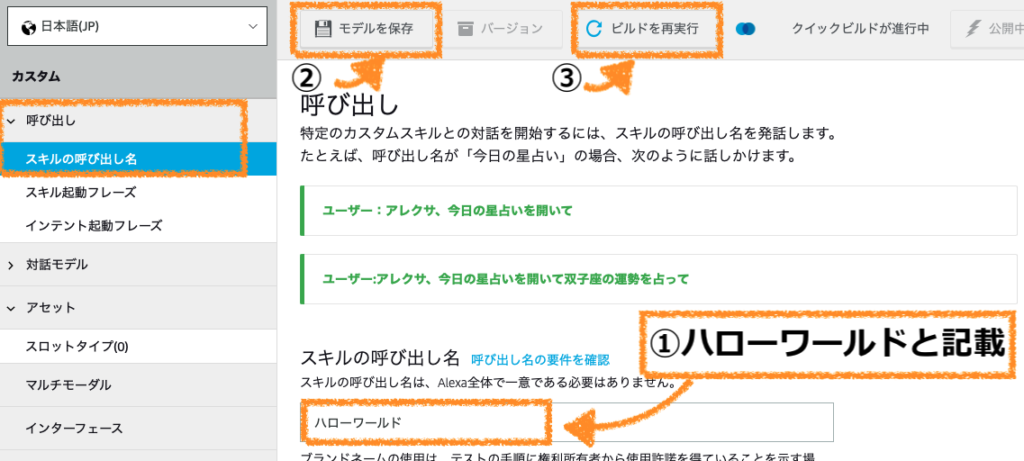
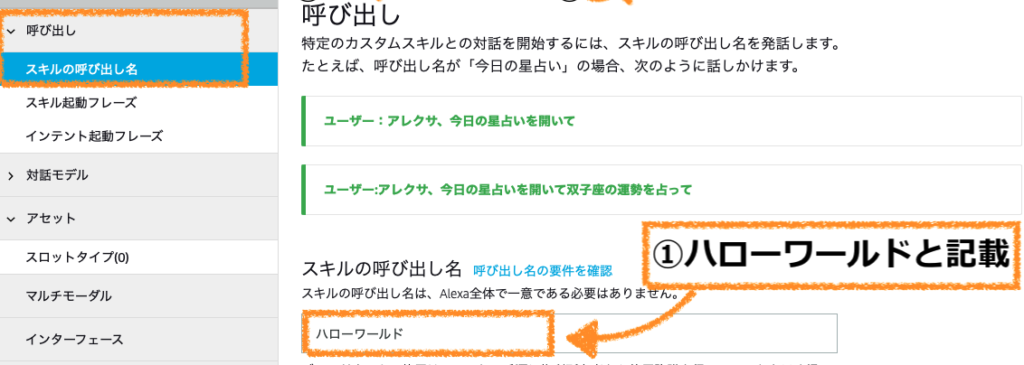
作成したスキルの画面右側にある「呼び出し」タブから、「スキルの呼び出し」を選択します。

スキルの呼び出し名を任意の名前に設定して、「モデルを保存」→「モデルをビルド」をクリックします。
以下の例では、呼び出し名を「ハローワールド」と設定しています。
この場合、「アレクサ、ハローワールドを開いて」というとカスタムスキルが起動するようになっています。
AWS Lambdaでの関数の作成
次に、スキルの処理部分をAWS Lambda関数で作成します。
以下の手順で作成していきます。
AWSマネジメントコンソールにログイン
AWSマネジメントコンソールにログインします。
(AWSのアカウントをお持ちでない方は、登録が必要です。)
Lambdaコンソールにアクセス
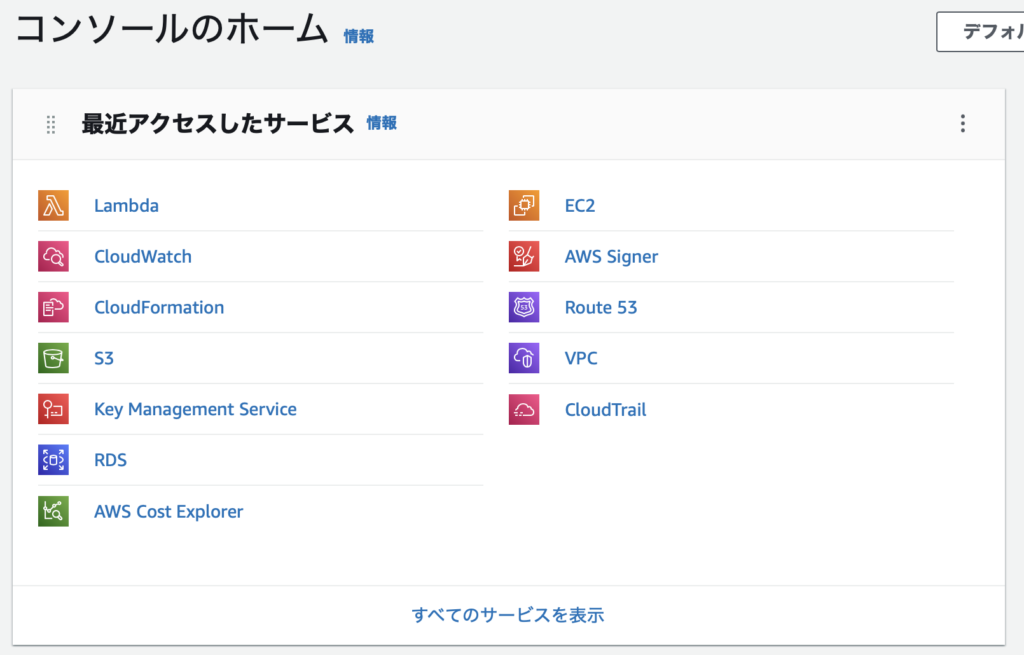
サービス検索で「Lambda」を選択し、Lambdaコンソールにアクセスします。
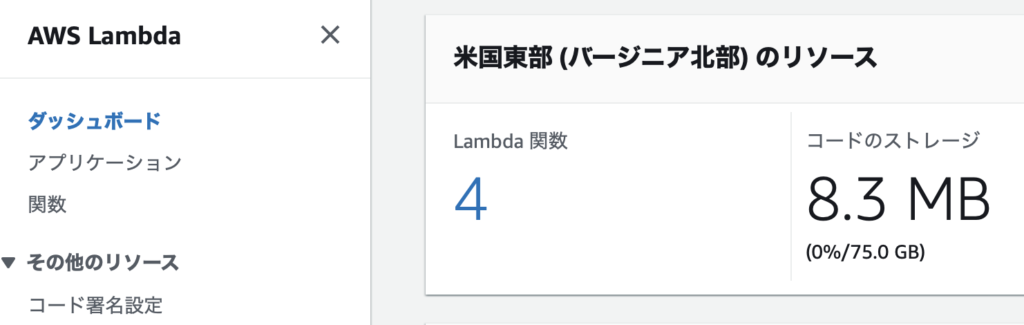
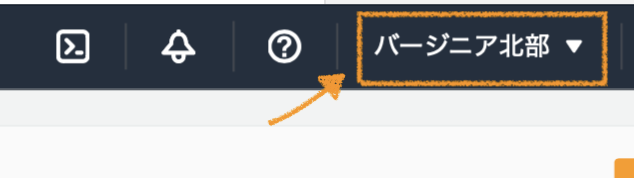
リージョンは「バージニア北部」になっていることを確認してください。
(後ほど、ARNをAlexa Developer Consoleに入力します。)
Lambda関数を作成する
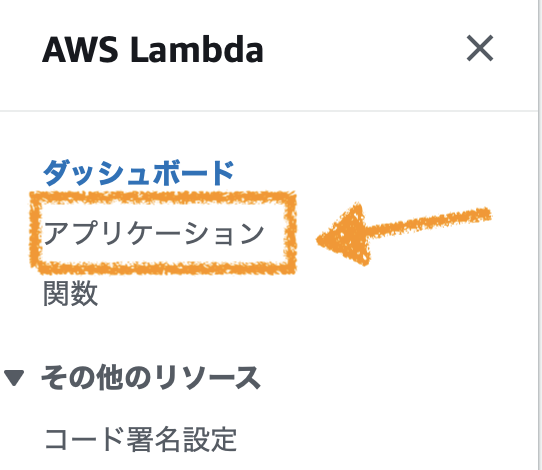
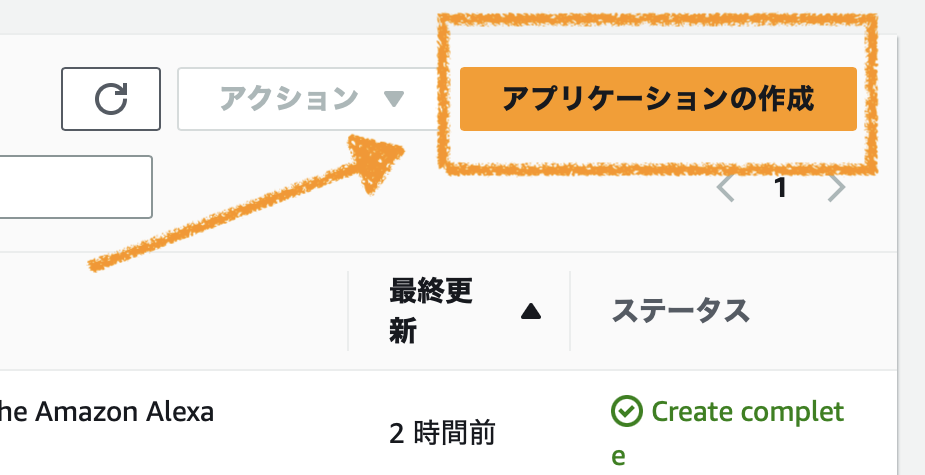
まず、AWS Lambdaの右画面にある「アプリケーション」を選択します。
「アプリケーションの作成」を押下します。
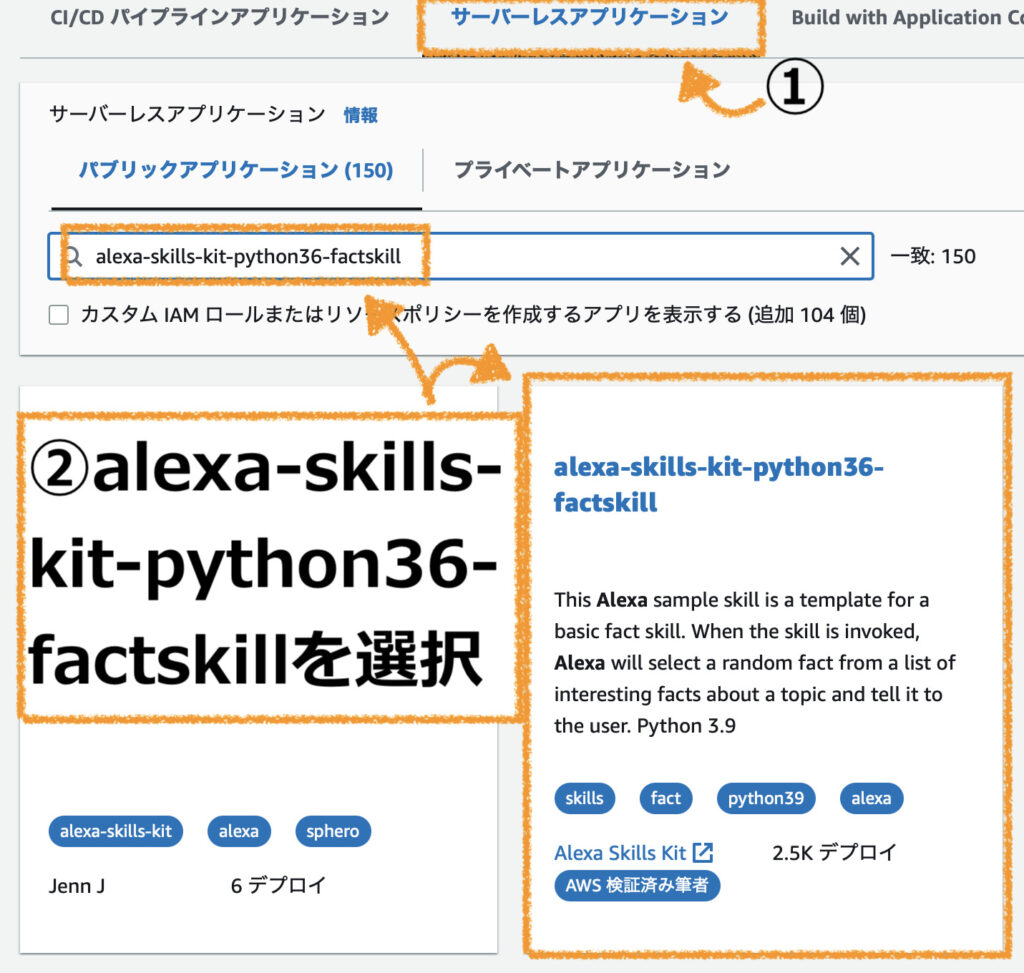
「サーバレスアプリケーション」を選択し、検索欄に「alexa-skills-kit-python36-factskill」と入力し、選択します。
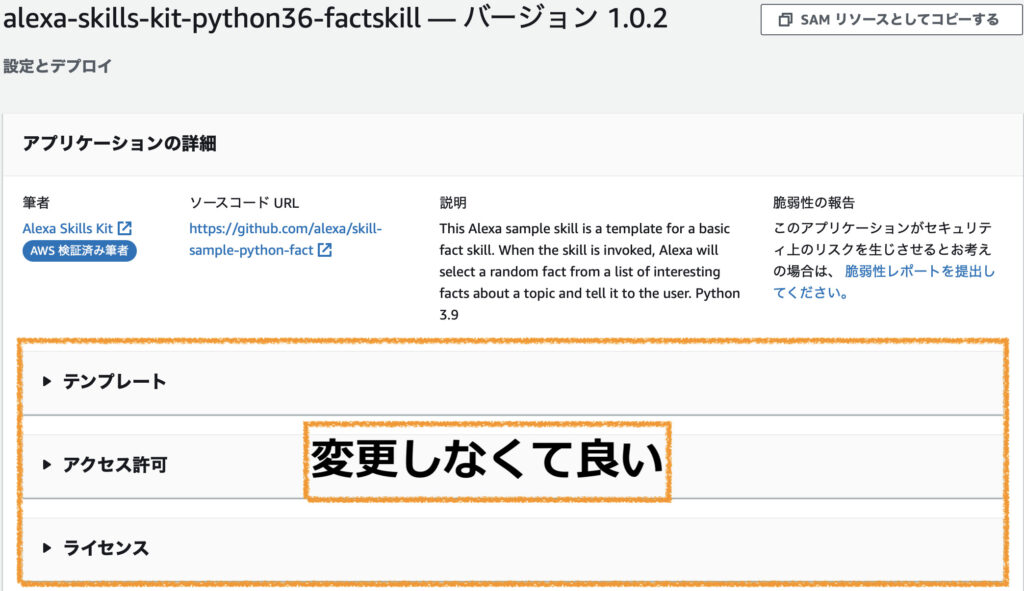
アプリケーションの設定画面に遷移します。
「テンプレート」、「アクセス許可」、「ライセンス」は変更しなくて良いです。
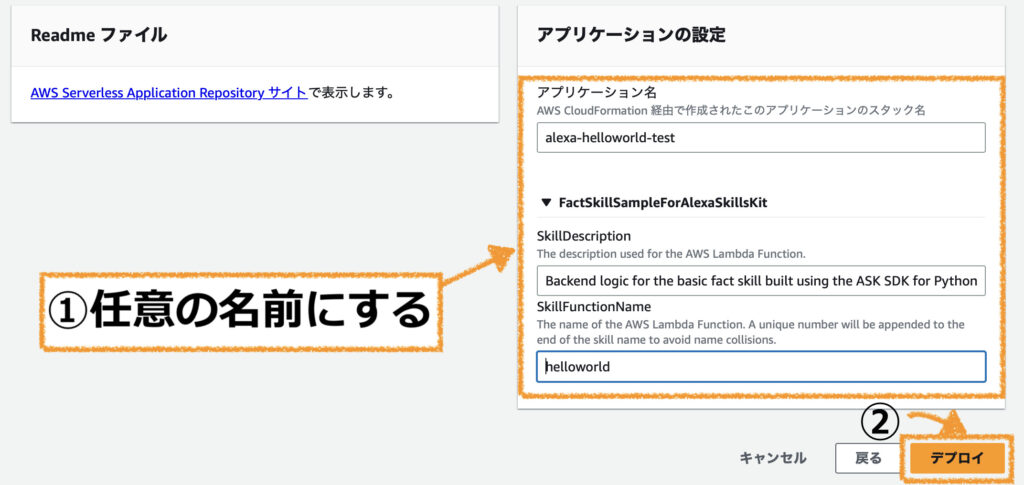
「アプリケーション名」、「SkillFunctionName」に任意の名前を入力して、「デプロイ」を押下します。
少し時間が経つと、「関数」の項目に入力した名前でLambda関数が作成されています。
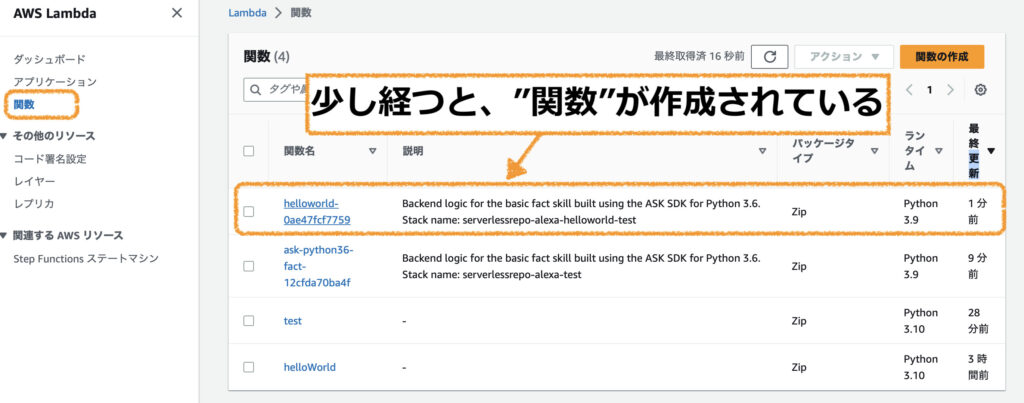
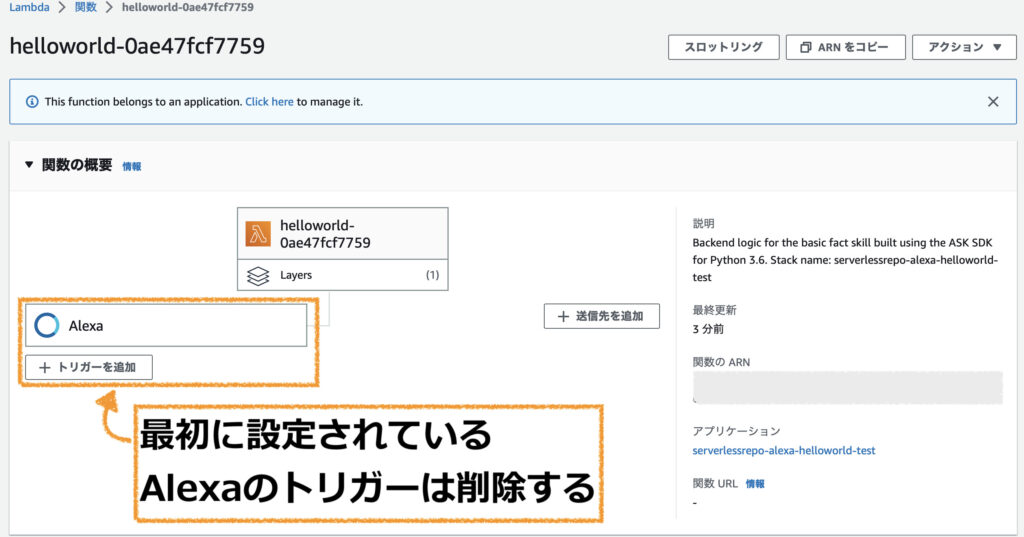
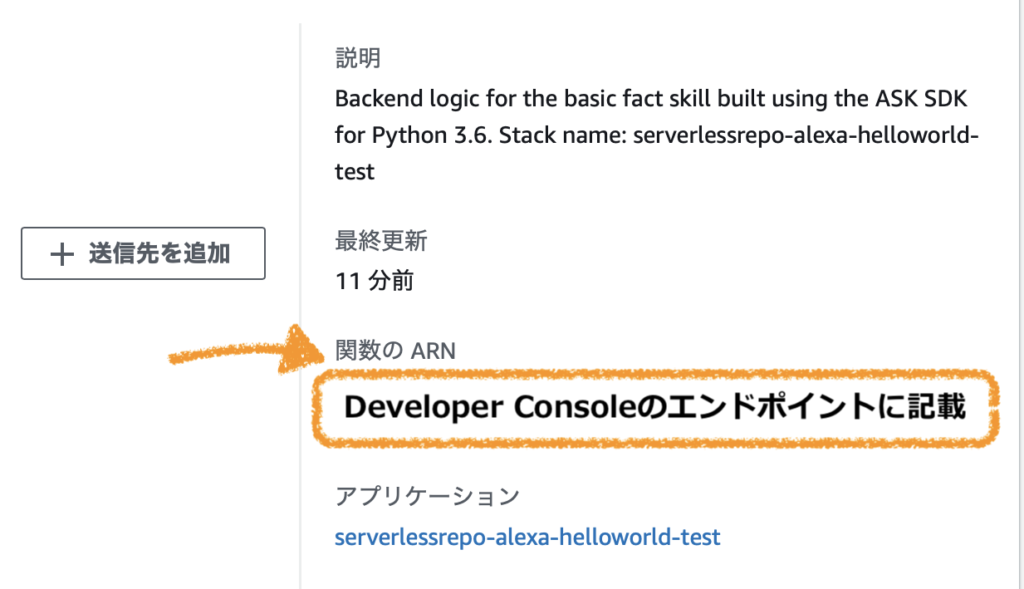
作成されたLambda関数を選択すると、以下のような概要画面に遷移します。
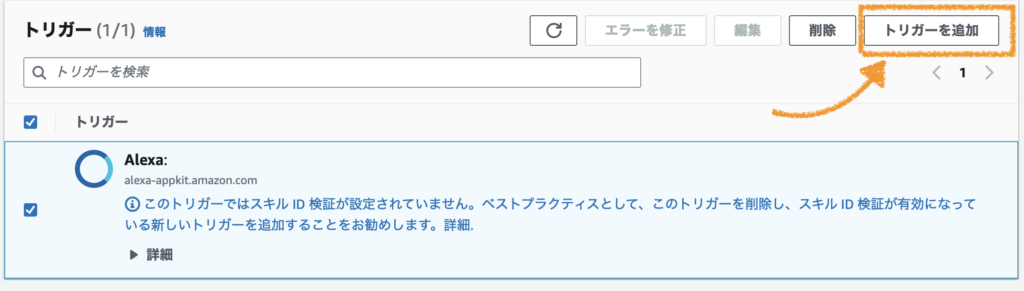
デフォルトでトリガーにAlexaが設定されていますが、一旦削除します。
↓↓
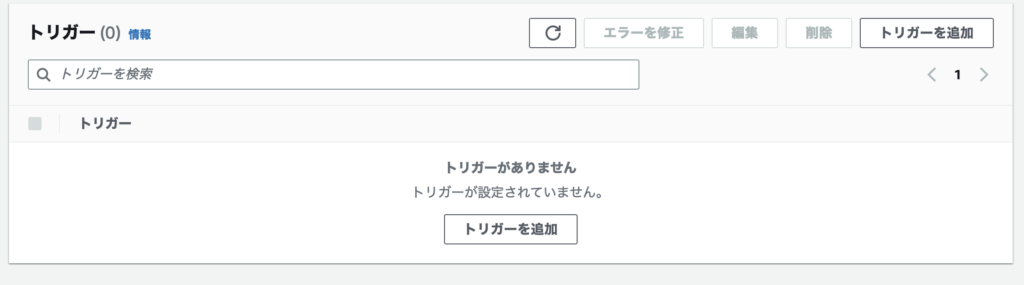
トリガーを削除
↓↓
Lambda関数とAlexaスキルの連携
次に、作成したLambda関数とAlexaスキルを連携させます。
「トリガーを追加」を押下し、Alexaを選択します。
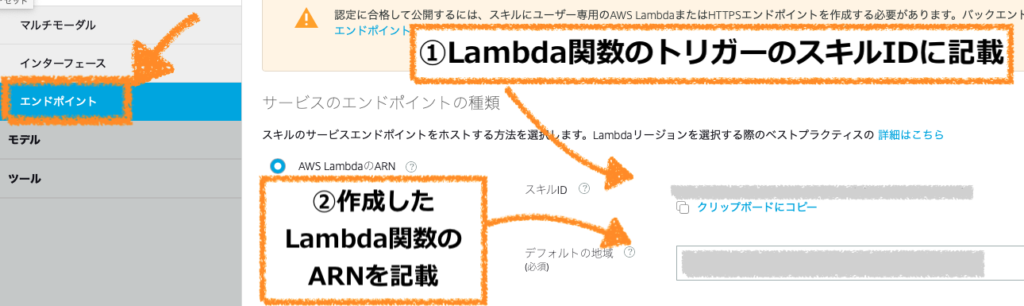
「スキルID検証」で有効(推奨)を選択し、Alexa Developer Consoleのエンドポイント画面から、スキルIDをコピペします。
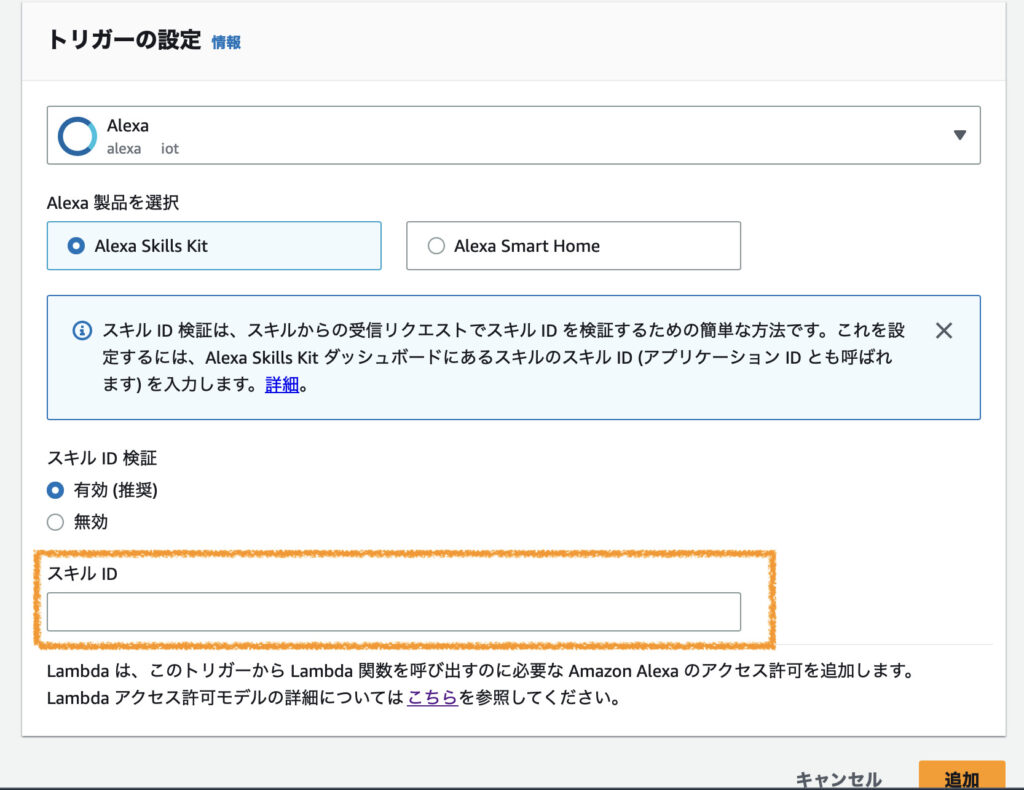
また関数のARNをコピーし、Alexa Developer Consoleのエンドポイント画面のARN入力欄に貼り付けます。
コードを貼り付けて、デプロイする
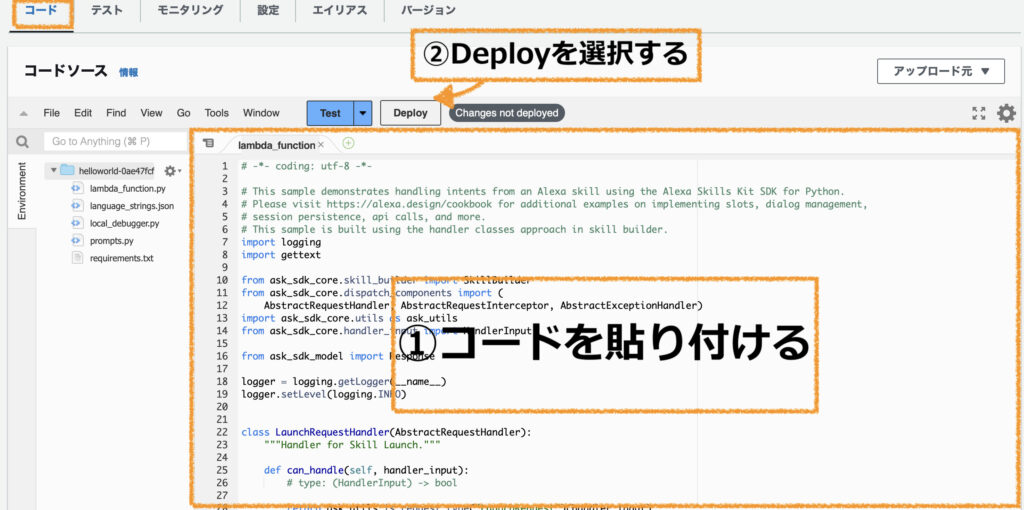
以下のコードを作成したLambda関数のlambda_function.pyに貼り付けます。
貼り付けが完了したら、「Deploy」を押下します。
# -*- coding: utf-8 -*-
# This sample demonstrates handling intents from an Alexa skill using the Alexa Skills Kit SDK for Python.
# Please visit https://alexa.design/cookbook for additional examples on implementing slots, dialog management,
# session persistence, api calls, and more.
# This sample is built using the handler classes approach in skill builder.
import logging
import gettext
from ask_sdk_core.skill_builder import SkillBuilder
from ask_sdk_core.dispatch_components import (
AbstractRequestHandler, AbstractRequestInterceptor, AbstractExceptionHandler)
import ask_sdk_core.utils as ask_utils
from ask_sdk_core.handler_input import HandlerInput
from ask_sdk_model import Response
logger = logging.getLogger(__name__)
logger.setLevel(logging.INFO)
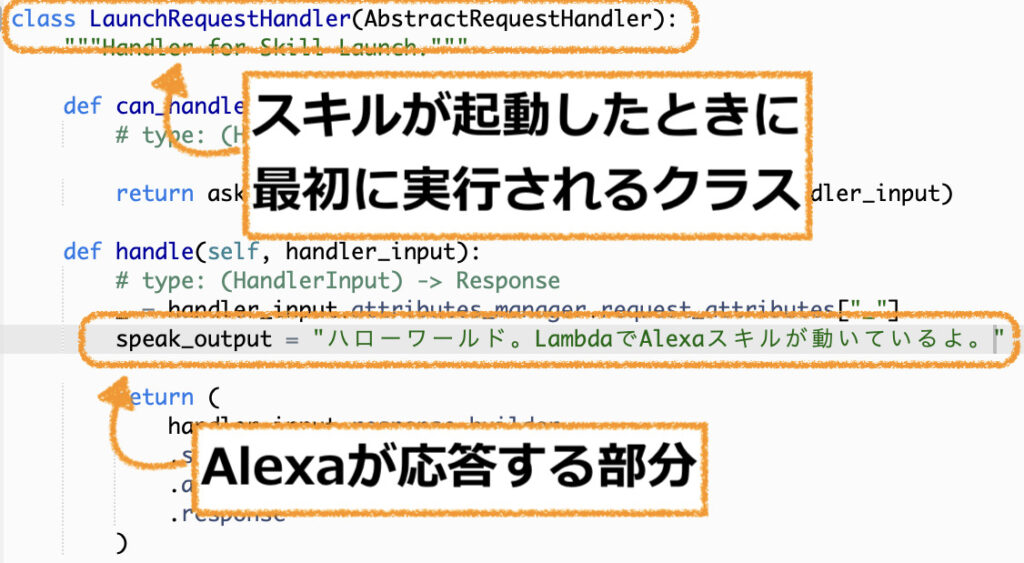
class LaunchRequestHandler(AbstractRequestHandler):
"""Handler for Skill Launch."""
def can_handle(self, handler_input):
# type: (HandlerInput) -> bool
return ask_utils.is_request_type("LaunchRequest")(handler_input)
def handle(self, handler_input):
# type: (HandlerInput) -> Response
_ = handler_input.attributes_manager.request_attributes["_"]
speak_output = "ハローワールド"
return (
handler_input.response_builder
.speak(speak_output)
.ask(speak_output)
.response
)
class HelloWorldIntentHandler(AbstractRequestHandler):
"""Handler for Hello World Intent."""
def can_handle(self, handler_input):
# type: (HandlerInput) -> bool
return ask_utils.is_intent_name("HelloWorldIntent")(handler_input)
def handle(self, handler_input):
# type: (HandlerInput) -> Response
_ = handler_input.attributes_manager.request_attributes["_"]
speak_output = "ハイ"
return (
handler_input.response_builder
.speak(speak_output)
# .ask("add a reprompt if you want to keep the session open for the user to respond")
.response
)
class HelpIntentHandler(AbstractRequestHandler):
"""Handler for Help Intent."""
def can_handle(self, handler_input):
# type: (HandlerInput) -> bool
return ask_utils.is_intent_name("AMAZON.HelpIntent")(handler_input)
def handle(self, handler_input):
# type: (HandlerInput) -> Response
_ = handler_input.attributes_manager.request_attributes["_"]
speak_output = "どうしましたか?"
return (
handler_input.response_builder
.speak(speak_output)
.ask(speak_output)
.response
)
class CancelOrStopIntentHandler(AbstractRequestHandler):
"""Single handler for Cancel and Stop Intent."""
def can_handle(self, handler_input):
# type: (HandlerInput) -> bool
return (ask_utils.is_intent_name("AMAZON.CancelIntent")(handler_input) or
ask_utils.is_intent_name("AMAZON.StopIntent")(handler_input))
def handle(self, handler_input):
# type: (HandlerInput) -> Response
_ = handler_input.attributes_manager.request_attributes["_"]
speak_output = "さようなら"
return (
handler_input.response_builder
.speak(speak_output)
.response
)
class FallbackIntentHandler(AbstractRequestHandler):
"""Single handler for Fallback Intent."""
def can_handle(self, handler_input):
# type: (HandlerInput) -> bool
return ask_utils.is_intent_name("AMAZON.FallbackIntent")(handler_input)
def handle(self, handler_input):
# type: (HandlerInput) -> Response
logger.info("In FallbackIntentHandler")
speech = "Hmm, I'm not sure. You can say Hello or Help. What would you like to do?"
reprompt = "I didn't catch that. What can I help you with?"
return handler_input.response_builder.speak(speech).ask(reprompt).response
class SessionEndedRequestHandler(AbstractRequestHandler):
"""Handler for Session End."""
def can_handle(self, handler_input):
# type: (HandlerInput) -> bool
return ask_utils.is_request_type("SessionEndedRequest")(handler_input)
def handle(self, handler_input):
# type: (HandlerInput) -> Response
# Any cleanup logic goes here.
return handler_input.response_builder.response
class IntentReflectorHandler(AbstractRequestHandler):
"""The intent reflector is used for interaction model testing and debugging.
It will simply repeat the intent the user said. You can create custom handlers
for your intents by defining them above, then also adding them to the request
handler chain below.
"""
def can_handle(self, handler_input):
# type: (HandlerInput) -> bool
return ask_utils.is_request_type("IntentRequest")(handler_input)
def handle(self, handler_input):
# type: (HandlerInput) -> Response
_ = handler_input.attributes_manager.request_attributes["_"]
intent_name = ask_utils.get_intent_name(handler_input)
speak_output = "こんにちは"
return (
handler_input.response_builder
.speak(speak_output)
# .ask("add a reprompt if you want to keep the session open for the user to respond")
.response
)
class CatchAllExceptionHandler(AbstractExceptionHandler):
"""Generic error handling to capture any syntax or routing errors. If you receive an error
stating the request handler chain is not found, you have not implemented a handler for
the intent being invoked or included it in the skill builder below.
"""
def can_handle(self, handler_input, exception):
# type: (HandlerInput, Exception) -> bool
return True
def handle(self, handler_input, exception):
# type: (HandlerInput, Exception) -> Response
logger.error(exception, exc_info=True)
_ = handler_input.attributes_manager.request_attributes["_"]
speak_output = "例外です。"
return (
handler_input.response_builder
.speak(speak_output)
.ask(speak_output)
.response
)
class LocalizationInterceptor(AbstractRequestInterceptor):
"""
Add function to request attributes, that can load locale specific data
"""
def process(self, handler_input):
locale = handler_input.request_envelope.request.locale
i18n = gettext.translation(
'data', localedir='locales', languages=[locale], fallback=True)
handler_input.attributes_manager.request_attributes["_"] = i18n.gettext
# The SkillBuilder object acts as the entry point for your skill, routing all request and response
# payloads to the handlers above. Make sure any new handlers or interceptors you've
# defined are included below. The order matters - they're processed top to bottom.
sb = SkillBuilder()
sb.add_request_handler(LaunchRequestHandler())
sb.add_request_handler(HelloWorldIntentHandler())
sb.add_request_handler(HelpIntentHandler())
sb.add_request_handler(CancelOrStopIntentHandler())
sb.add_request_handler(FallbackIntentHandler())
sb.add_request_handler(SessionEndedRequestHandler())
# make sure IntentReflectorHandler is last so it doesn't override your custom intent handlers
sb.add_request_handler(IntentReflectorHandler())
sb.add_global_request_interceptor(LocalizationInterceptor())
sb.add_exception_handler(CatchAllExceptionHandler())
handler = sb.lambda_handler()スキルを起動したときに、まず初めにLaunchRequestHandlerクラスの中身が実行されます。speak_outputでAlexaが実際に応答する内容を記載しています。
今回は、ユーザーが”ハローワールドを開いて”と言ってスキルを呼び出した際に、”ハローワールド。LambdaでAlexaスキルが動いているよ。”という言葉を返すようにしています。
ランタイムの編集
その後、画面下部にある「ランタイム設定」で「編集」を押下します。

「ハンドラ」をlambda_function.handlerに変更します。
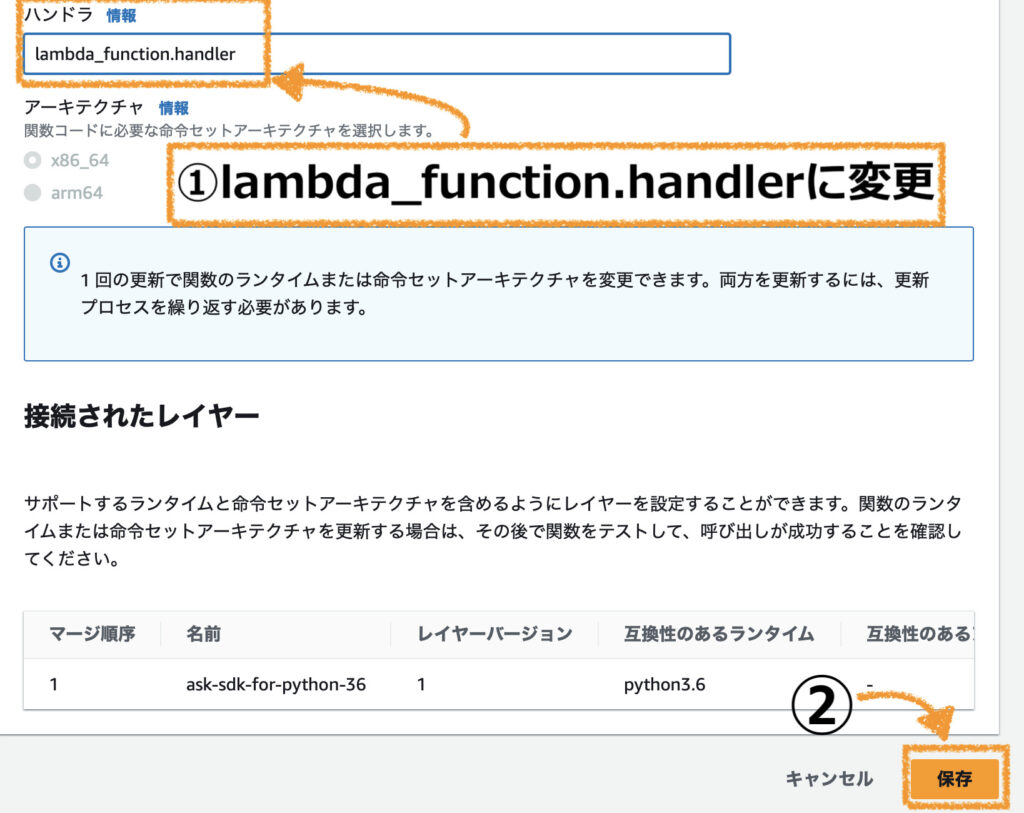
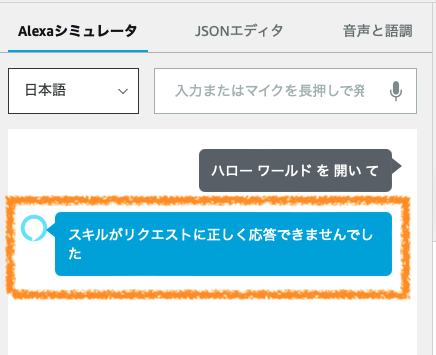
ちなみにハンドラを変更しなかった場合、「[ERROR] Runtime.HandlerNotFound: Handler ‘lambda_handler’ missing on module “lambda_function’ Traceback…」というエラーが発生します。(CloudWatchのロググループに出力されます。)

この状態でスキルをテストした際は、「スキルがリクエストに正しく応答できませんでした。」となり、正常にスキルが起動しません。
Alexaスキルのテスト

これで設定は終わりです。
最後にAlexa Developer Consoleからスキルのテストをしましょう。
以下の方法で作成したスキルが正しく動作するかテストできます。
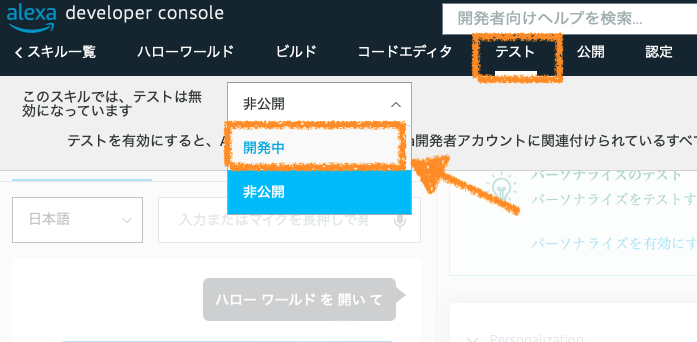
Developerコンソールで「テスト」する
Alexa Developer Consoleで「テスト」の項目を選択し、「開発中」に変更します。
(開発中にすることで、画面上でテストが実行できるようになります。)
テスト用の入力欄に、スキルを起動するためのフレーズを入力
今回の場合、スキルの呼び出し名に「ハローワールド」と設定したので、「ハローワールドを開いて」と入力することでスキルが起動します。
「ハローワールド。LambdaでAlexaスキルが動いているよ。」と表示されれば、スキルが正しく動いているので無事に成功です!
今回のスキルの起動名は、最初にスキル設定した際に入力した「スキルの呼び出し名」です。
Echoでもスキル確認してみる
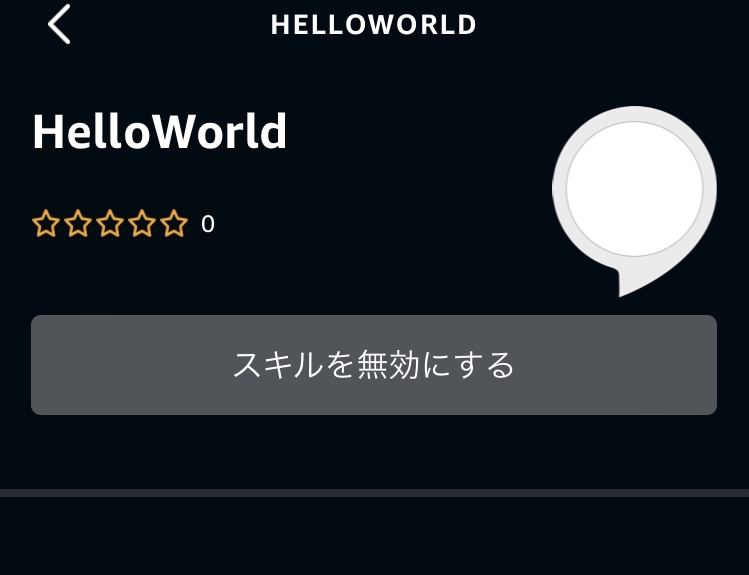
ちなみに実際にEchoに「ハローワールドを開いて」と呼びかけてみても、同じように動作していることを確認することができます。
もしEchoに話しかけてもスキルが起動しない場合は、スマホのAlexaアプリからカスタムスキルが有効になっていることを確認してみてください。
まとめ
Alexa Developer Consoleで作成したAlexaスキルをAWS Lambdaで作成する方法を紹介しました。今回は、簡単な言葉を返すだけの実用性のないスキルでしたが、どんなスキルでもLambdaを使ったスキルを作成する場合の基本は同じなので、このやり方を応用することで、自分だけのスキルを作成して楽しめることでしょう。
興味のある方は、ぜひ挑戦してみてください。
最後まで見て頂きありがとうございました!ではでは。


記事を掲載いただきありがとうございます!
現在社内開発でアレクサを使用するプロジェクトが走っているのですが、一部記事を参考にさせていただいても解決できていない問題があるのですが、アドバイスをいただくことは可能でしょうか?